NanoVNA Antenna Testing for 915 MHz LoRa Mesh Nodes
Measure SWR, impedance, and resonant frequency on 915 MHz LoRa antennas with a NanoVNA. Calibration, reading the display, and what good looks like.
You bought a fancy antenna for your mesh node. How do you know if it’s actually any good?
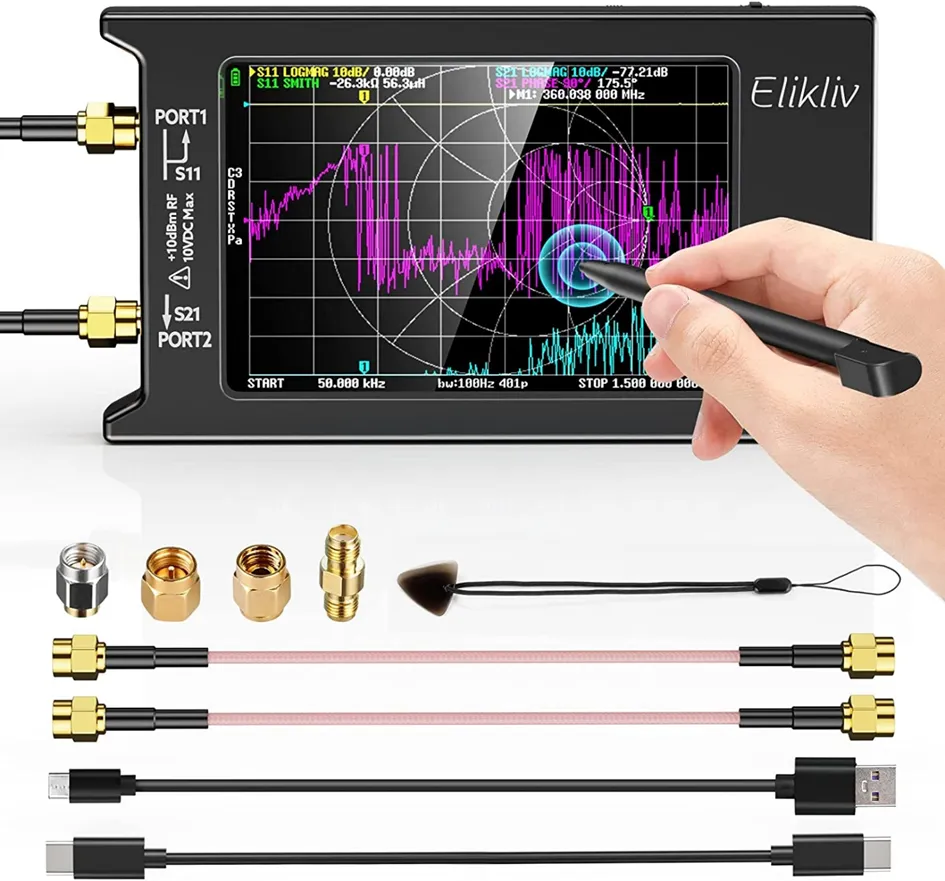 A typical NanoVNA kit includes the device, calibration standards (the small gold connectors), and SMA cables.
The NanoVNA (Vector Network Analyzer) is a sub-$50 tool that tells you how well your antenna is performing at 915 MHz, the frequency used by Meshtastic and MeshCore in the US. No more guessing. No more “this antenna feels better.”
We’ve put every LoRa antenna on our network through a NanoVNA. Some tested well, some didn’t, and a few “915 MHz” antennas turned out to be relabeled 868 MHz units. This guide walks through exactly how to get clean measurements, using the same workflow we use when a new antenna shows up.
Whether you have a NanoVNA-H, NanoVNA-H4, or NanoVNA-F, the process is nearly identical.
What You’ll Learn
- What a NanoVNA actually measures
- How to calibrate it properly (this is critical)
- How to measure SWR and impedance at 915 MHz
- What “good” looks like for a LoRa antenna
- Common problems and how to spot them
What is a NanoVNA?
A Vector Network Analyzer measures how radio frequency signals behave when they hit your antenna. It tells you:
- SWR (Standing Wave Ratio). How much power actually goes into the antenna vs. how much bounces back.
- Impedance. Whether your antenna matches the 50-ohm standard used by your radio.
- Resonant frequency. The frequency where your antenna works best.
For mesh networking, we care most about SWR at 915 MHz. A lower SWR means more of your transmit power actually radiates instead of reflecting back into your radio.
NanoVNA-H vs NanoVNA-H4 vs NanoVNA-F
There are several NanoVNA models on the market. Here’s what matters.
| Model | Screen | Frequency Range | Best For |
|---|---|---|---|
| NanoVNA-H | 2.8” | 50 kHz - 1.5 GHz* | Budget option, works for 915 MHz |
| NanoVNA-H4 | 4.0” | 10 kHz - 1.5 GHz | Larger screen, easier to read |
| NanoVNA-F | 4.3” | 10 kHz - 1.5 GHz | Metal case, more rugged |
For testing LoRa antennas at 915 MHz, any of these will work. The H4 and F models have larger screens which make field use easier, but the original H model is perfectly functional.
The NanoVNA-H uses harmonic measurement above 900 MHz, which reduces accuracy. It still works fine for basic antenna testing at 915 MHz, but the H4 and F models give cleaner readings.
Many “NanoVNA” devices on Amazon are clones of varying quality. Stick with sellers that have good reviews and show the actual product. Firmware can usually be updated regardless of brand.
What’s in the Box
Most NanoVNA kits include:
- The NanoVNA device itself
- Calibration standards (Open, Short, Load). These are critical.
- Two SMA cables
- USB-C cable for charging and PC connection
- Sometimes a carrying case
 Calibration standards: Open (O), Short (S), and Load/Match (Ω) in both male and female versions. The symbols are printed on the heat shrink labels. Photo: Mario Hellmich
The calibration standards are small metal connectors that screw onto the NanoVNA’s ports. You’ll use these every time you test. Look at the labels:
- O = Open (no center pin connection)
- S = Short (center pin shorted to ground)
- Ω = Load (precision 50-ohm resistor)
Understanding the Ports
Your NanoVNA has two SMA ports:
- CH0 (Port 1). This is where you connect your antenna for basic testing.
- CH1 (Port 2). Used for transmission measurements, not needed for antenna testing.
For SWR and impedance measurements, you only need CH0.
Step 1: Power On and Basic Setup
- Charge the device. Use the USB-C port. Most NanoVNAs have built-in batteries.
- Power on. Press and hold the power button (usually the jog wheel or a dedicated button).
- Set your frequency range:
- Tap the screen or use the jog wheel to access the menu
- Go to STIMULUS → START and set to 850 MHz
- Go to STIMULUS → STOP and set to 950 MHz
This gives you a 100 MHz window centered around our target of 915 MHz. You want to see how your antenna behaves across the entire LoRa band, not just at a single frequency. That window helps you spot problems and see the overall tuning.
Step 2: Calibration (Don’t Skip This)
Calibration is the most important step. An uncalibrated NanoVNA will give you garbage readings.
The NanoVNA needs to learn what “perfect” looks like at your test frequency. You do this by connecting known standards to CH0.
Calibration process
- Access calibration menu: Menu → CAL → CALIBRATE
- Connect OPEN standard to CH0. Screw the OPEN cap onto CH0. Select OPEN in the menu. Wait for the sweep to complete.
- Connect SHORT standard to CH0. Remove OPEN, attach SHORT. Select SHORT in the menu. Wait for the sweep.
- Connect LOAD standard to CH0. Remove SHORT, attach LOAD. Select LOAD in the menu. Wait for the sweep.
- Save calibration. Select DONE or SAVE. Choose a calibration slot (0-4).
You need to recalibrate whenever you:
- Change the frequency range
- Move from indoors to outdoors (temperature affects calibration)
- Use a different cable
Verifying calibration
After calibrating, connect the LOAD standard again. Your SWR should read very close to 1.0 and impedance should be near 50 + j0 ohms. If it’s way off, recalibrate.
Step 3: Set Up Your Display
Before measuring, configure the screen to show useful information.
- Set Trace 1 to SWR:
- Menu → DISPLAY → TRACE → TRACE 0
- Select FORMAT → SWR
- Set Trace 2 to Smith Chart or Impedance (optional):
- DISPLAY → TRACE → TRACE 1
- Select FORMAT → SMITH or R + jX
- Add a marker at 915 MHz:
- Menu → MARKER → MARKER 1 → ON
- Select MARKER → SEARCH → 915 MHz (or drag to position)
The marker will show you exact values at 915 MHz.
Step 4: Measure Your Antenna
Now the fun part.
- Connect your antenna cable to CH0. Use the shortest cable possible. Finger-tight connectors.
- Connect your antenna to the cable. If your antenna has an SMA connector, you might need an adapter. Watch out for RP-SMA (reverse polarity). This is common on LoRa antennas.
- Read the results.
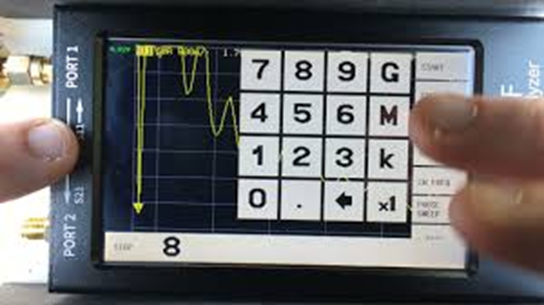 The NanoVNA display showing an SWR trace. The dip in the yellow line indicates where the antenna is best matched. Photo: BARK
Look at the marker reading at 915 MHz. You’ll see:
- SWR value. Lower is better.
- Impedance. Closer to 50 ohms is better.
Step 5: Interpreting Your Results
SWR guidelines for LoRa
| SWR | What It Means |
|---|---|
| 1.0 to 1.5 | Excellent. Your antenna is well-matched. |
| 1.5 to 2.0 | Good. Acceptable for most deployments. |
| 2.0 to 3.0 | Marginal. You’re losing some power, but it’ll work. |
| 3.0+ | Poor. Significant power loss. Investigate the cause. |
For mesh networking, SWR under 2.0 at 915 MHz is perfectly fine. Don’t chase perfection. An SWR of 1.2 vs 1.5 won’t make a noticeable difference in range.
What if your SWR is high
Common causes:
- Wrong frequency. Your antenna might be tuned for 868 MHz (European LoRa) instead of 915 MHz.
- Bad connector. Damaged SMA or loose connection.
- Cheap antenna. Some “915 MHz” antennas are just relabeled 868 MHz units.
- Missing ground plane. Many antennas need a metal surface beneath them.
- Cable loss. Long or cheap coax can throw off readings.
Finding resonant frequency
Look at where the SWR dip occurs on the graph. That’s your antenna’s resonant frequency.
- Dip at 915 MHz. Perfect.
- Dip below 915 MHz. Antenna is “long” (physically or electrically).
- Dip above 915 MHz. Antenna is “short.”
Some antennas are adjustable. If yours has a tuning element, you can try to shift the resonance to 915 MHz.
Using NanoVNA-Saver Software
For more detailed analysis, connect your NanoVNA to a computer.
- Download NanoVNA-Saver. Free, open-source software for Windows, Mac, and Linux. github.com/NanoVNA-Saver/nanovna-saver.
- Connect via USB-C.
- What it gives you over the device alone:
- Larger, clearer graphs
- Export data for records
- Compare multiple antennas
- Smith chart analysis
- Touchstone file export
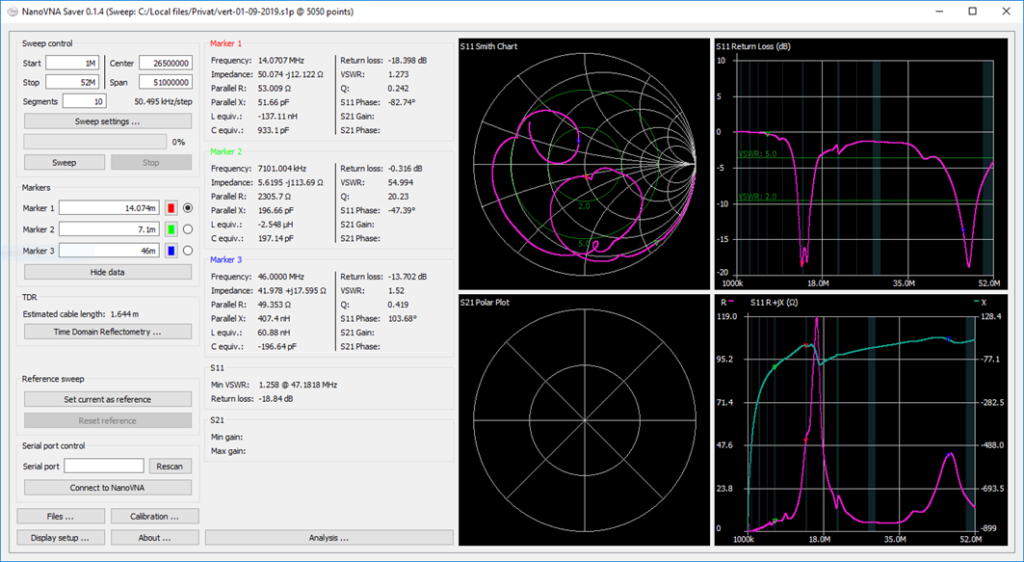 NanoVNA-Saver provides larger graphs and more analysis options than the device screen alone. Photo: BARK
Practical Testing Tips
Test with the real setup
The antenna’s performance changes based on what’s around it. For accurate results:
- Test with the same cable you’ll use in deployment
- Test with the antenna in its final mounting position if possible
- Test away from metal objects (except intended ground planes)
- Your body affects readings. Step back after pressing “sweep.”
Document your results
Take photos of the NanoVNA screen or export data from the PC software. When you’re troubleshooting range issues later, knowing your antenna started at SWR 1.4 vs 2.8 is valuable information.
What about antenna gain
The NanoVNA measures SWR and impedance, not gain. A perfectly matched antenna (SWR 1.0) with 0 dBi gain will perform worse than a slightly mismatched antenna (SWR 1.5) with 6 dBi gain.
SWR tells you about efficiency, not directionality or total radiated power.
Common Mistakes to Avoid
- Not calibrating. Biggest source of bad readings.
- Calibrating at the wrong frequency. Always calibrate for your test range.
- Using adapters carelessly. Every adapter adds loss and potential error.
- Testing indoors surrounded by metal. Reflections skew results.
- Touching the antenna during measurement. Your hand changes the antenna’s properties.
- Ignoring RP-SMA. Many LoRa devices use reverse polarity SMA. Check your connectors.
Who This Guide Is For
If you build, tune, or deploy LoRa antennas and you want to know what you’re actually putting on the air, a NanoVNA is worth the $50. The first time you catch a “915 MHz” antenna that’s resonant at 868 MHz, the tool has paid for itself.
If you’re running one stock antenna that ships with a commercial node and your range is working, you probably don’t need one. The NanoVNA is most valuable when you’re comparing antennas, debugging range issues, or trying to tune something.
If you’re deploying solar repeaters or permanent base stations where antennas stay in place for years, run every antenna through a NanoVNA before mounting it. Checking SWR once you’re on a roof is not fun.
Quick Reference
- Set frequency range to 850 to 950 MHz
- Calibrate with OPEN, SHORT, LOAD
- Connect antenna to CH0
- Read SWR at 915 MHz marker
- SWR under 2.0 is good to go
Five steps to know if your antenna is working.
Where to Buy
- NanoVNA-H4. Available on Amazon, AliExpress, and ham radio retailers. $50 to $70.
- NanoVNA-F. Similar price, metal case version.
- Original NanoVNA-H. Budget option. $30 to $50.
Look for kits that include calibration standards. Some ultra-cheap units skip these, and you’ll need to buy them separately.
Ready to optimize your node? Check out our antenna guides or learn more about device selection.
Image credits:
- Calibration standards photo: Mario Hellmich
- NanoVNA screen photos: Boland Amateur Radio Klub (BARK)
- NanoVNA is open-source hardware. Support the developers by buying from reputable sellers.
Comments
Related Posts
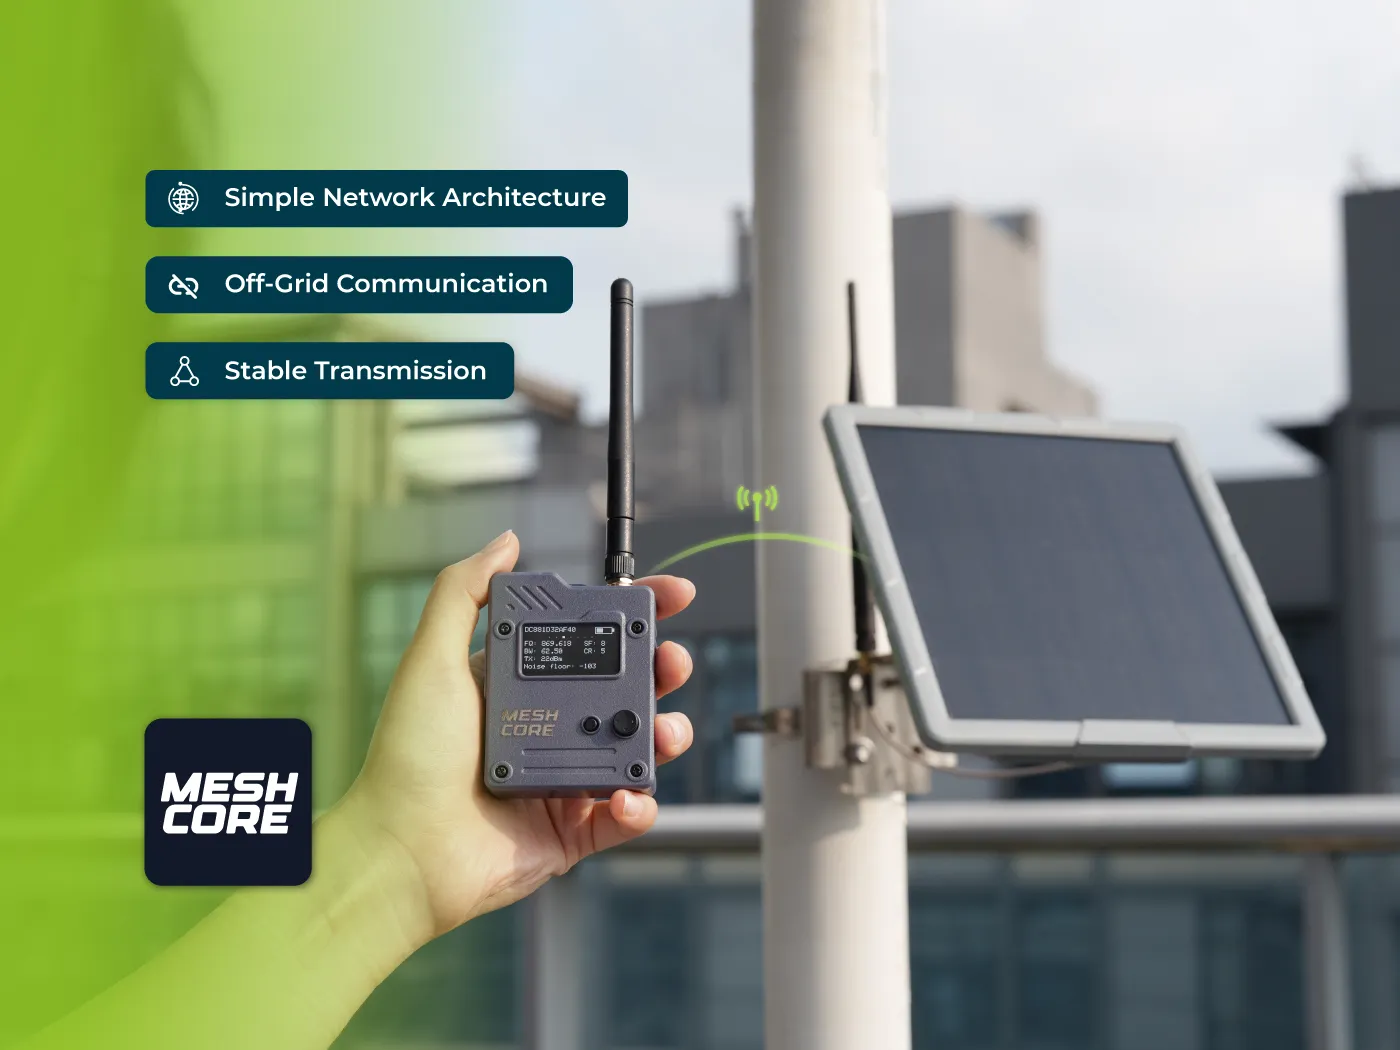
Seeed MeshCore Starter Kit: Solar Repeater + Client Bundle
Seeed's MeshCore Starter Kit bundles a solar repeater and Wio Tracker L1 Pro into one off-grid mesh. Antenna picks, setup tips, and who it's for.
MeshCore Path Hash Modes Explained: 1, 2, and 3 Byte
How MeshCore's 1, 2, and 3 byte path hashes work, why 1-byte collides at scale, and when to switch. Guide to path.hash.mode for growing meshes.

Meshtastic Range Test: Map Your Mesh Coverage
Measure and map Meshtastic coverage with the range test module, trace route, signal metrics, and MeshMapper. Field tips for flat-plains deployments.